1. Choose a clean background. If possible, choose an outdoor setting with some greenery – trees, bushes, anything with green or flowers. Place the subjects several feet in front of the background. If indoors, take a couple minutes to select a posing spot and clear any clutter out of the background. Try to avoid direct sunlight. If you have no choice, place the sun behind them and off to one side and force the flash to fire. That will create a highlight on their hair, but you will have to balance the lighting with some front light from flash or reflectors.
2. Fall back and zoom. Most cameras have a zoom feature. To compose your image, you can either zoom out (wide) and get close, or zoom in (tele) and step back. Try the latter. By stepping back, you shorten the facial features and create a more attractive image of the subjects’ faces.
3. Stabilize the camera. If you have a tripod or monopod (stick), use it. If not, try to set the camera on a stable object. The worst possible way to shoot is to hold it out in front of you with two hands. The camera will move and the image will be blurry.
4. Know when to flash your subjects. In general, don’t use on-camera flash indoors. If you have an SLR camera with a separate flash, you can consider bouncing if off of the wall or ceiling. But indoors, the little camera flash will create a very cheap look and very hard shadows on the wall behind them. It’s better to use available light and shoot with a stable camera. Outdoors, a bit of fill flash may be good to minimize eye circles.
5. Mind the white balance. Most cameras have a white balance selection. Instead of auto, choose the white balance that is appropriate for the predominant light source. Outside in shade: choose Shade. It will have a great impact on your image colors.
6. Compose the groups. If you have multiple couples, take a couple of shots of each lady in full length, then half (waist up). Then get each couple, generally with the man a bit behind the lady and off one shoulder. Have him place his arms around her waist and you can show his and her flowers as well. Then get all of the ladies together and then all of the men, and finally, one shot with all of the couples. Avoid the “Adam and Eve” look with hands together in front. Hands at sides, or partially in pockets, or holding flowers or each other. A bit of physical contact between subjects conveys a much warmer, friendlier image.
7. One camera at at time! To have the photos come out best, make sure the subjects place their attention on just one camera at a time. Otherwise, the eyes of some subjects will not be looking at the camera. If you have one parent with all the gear and experience, let them guide the posing and the first shots, and then the others can step in before the pose is changed.
8. Vary your angle. Sometimes shooting waist level is a good way to capture the whole dress, or far above for a dreamy look.
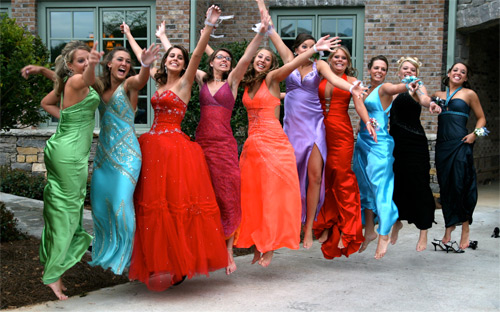
9. Throw in some creative and fun poses. Everyone is nervous and feels a bit akward about being so dressed up and being with a crowd of kids and parents. Encourage the kids to loosen up and shoot some fun candids. Add the little sister or brother for a shot or two, or the family dog.
10. Multiple shots for multiple people. The more people in an image, the greater the likelihood that someone will be blinking in any shot. For larger groups, take at least 5 images. One trick is to have everyone close their eyes, and on a count of three, open them and smile.
11. Quick edits. Spend a couple of minutes to rotate the images so they all show up correctly, and consider a few basic edits: Contrast, color saturation, exposure levels, cropping. These fundamental editing steps will take a good shot and make it great.
Source : http://www.picturecorrect.com - Auothor : John Huegel


